0. The Basics of R: Starting-up
 Finding your way in RStudio
Now that you have both R and RStudio on your computer, you can begin using R by opening the RStudio program. Open RStudio just as you would any program, by clicking on its icon or by typing 'RStudio' at the Run prompt.
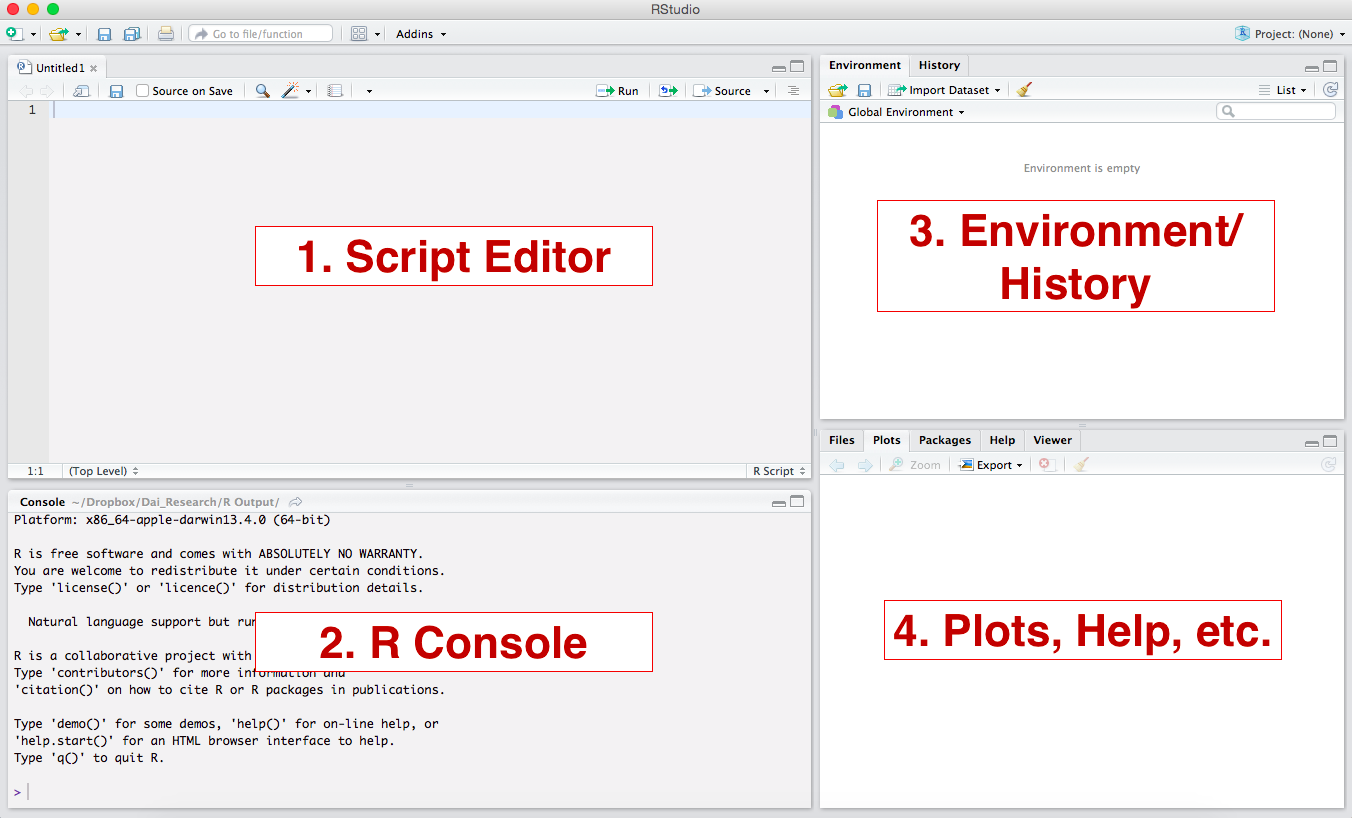
When opening RStudio for the first time you will get a window with 3 panels. Click on the little icon at the top left that looks like this:  Now you will have 4 panels.

These are the 4 panels you will have:
- Script Editor (Top Left): This is where you will build your script. It is essentially a text editor, but has some nice features that make it especially suitable to work with R-code (like syntax coloring, completion of commands, highlighting of errors). This window may not automatically appear (you first have to open a file or create a new file). We will use it a lot.
- R Console (Bottom Left). This is where the commands run.
- Environment/History (Upper Right). This area will show all objects that are loaded in the workspace. The “History” tab will show you what you have done in the current workspace.
- Plots, etc. (Lower Right). This is where plots will show up. Other tabs will take you to help files, package manager, etc.
You can set the panels up however you like by going to [Preferences]–[Pane Layout]. For this class, we recommend keeping the pane layout the same as the one above, so you don’t get confused.
Now, let’s see what each window does in more detail.
The console
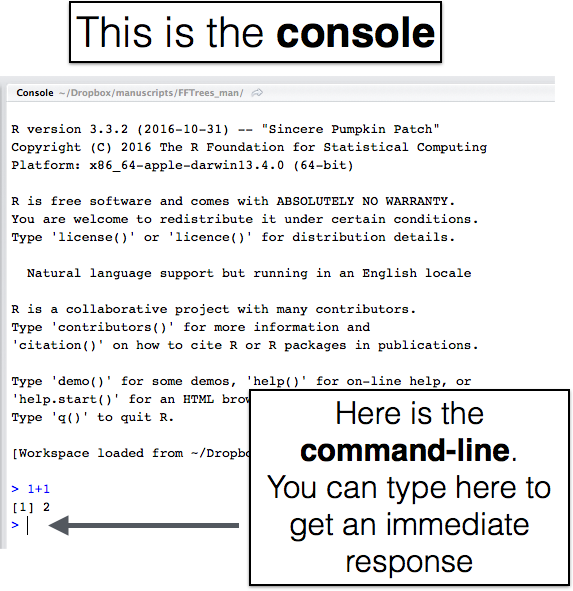
R code, on its own, is just text. You can write R code in a new script (within RStudio, or in any text editor - on Twitter if you want). However, just writing the code won’t do the whole job – in order for your code to be executed (aka, interpreted) you need to send it to R’s command-line interpreter. In RStudio, the command-line interpreter is called the Console.

In R, the command-line interpreter starts with the > symbol. This is called the prompt. Why is it called the prompt? Well, it’s “prompting” you to feed it with some R code. The fastest way to have R evaluate code is to type your R code directly into the command-line interpreter. For example, if you type 1+1 into the interpreter and hit Enter you’ll see the following
> 1+1
[1] 2
As you can see, R returned the (thankfully correct) value of 2. You’ll notice that the console also returns the text [1]. This is just telling you the index of the value next to it. Don’t worry about this for now, it will make more sense later. As you can see, R can do basic calculations. In fact, at its heart, R is technically just a fancy calculator. But that’s like saying Michael Jordan is just a fancy ball bouncer or J.S. Bach was just an organ player. It (and they), are much more than that.
Script editor - Your notepad for code
The source pane is where you create and edit "R Scripts" - your collections of code. Don’t worry, R scripts are just text files with the ".R" extension. When you open RStudio, it will automatically start a new Untitled script. Before you start typing in an untitled R script, you should always save the file under a new file name. That way, if something on your computer crashes while you’re working, R will have your code waiting for you when you re-open RStudio.
You’ll notice that when you’re typing code in a script in the Source panel, R won’t actually evaluate the code as you type. To have R actually evaluate your code, you need to first ‘send’ the code to the Console (we’ll talk about this in the next section).
There are many ways to send your code from the Source to the console. The slowest way is to copy and paste. A faster way is to highlight the code you wish to evaluate and clicking on the “Run” button on the top right of the Source. Alternatively, you can use the hot-key “Command + Return” on Mac, or “Control + Enter” on Windows to send all highlighted code to the console.
Panes at the right
The panes at the right show a lot of important information which you will appreciate once you will be using RStudio. In the Environment, for instance, you have a convenient list of all the data that are loaded, in the Plot pane figures will be shown and the Help pane will provide information about functions. For now, we will just leave it here and explain the structure of the help pages in the next section.


